Flag signals
Disclaimer: this is a system for The Duke’s Winter Cup 2026, so it may differ from other tournament systems.
Purpose
We want most of the decisions to be made without consultations and video review. That’s why we need a clear signal system, so the main judge could quickly understand the side judge’s decision and make his own.
We understand that the signals do not cover all the situations, but expect that the most common cases could be processed immediately.
General guidelines
- Side judges should indicate the actions that they have seen, using sound and additional information (distance, angle of the attack) as a second source of data.
- Judges MUST NOT use fighters words and reactions as information, only what they have seen.
- Side judges do not say anything, only the flag signs. Exceptions:
- Answering to the main judges questions
- To stop action in case of a dangerous situation
- The flags SHOULD be raised immediately (no matter how) after any valid actions, so that the main judge could stop the fight.
- Then the judges can take some time (1-2 seconds) to think about the exchange (not looking at other judges!) and show the actual decision
- Then the judges hold the flags until the final result is announced by the main judge.
- In case of unclear decision or challenge, the judges come to discuss the exchange, see the procedure.
Signals
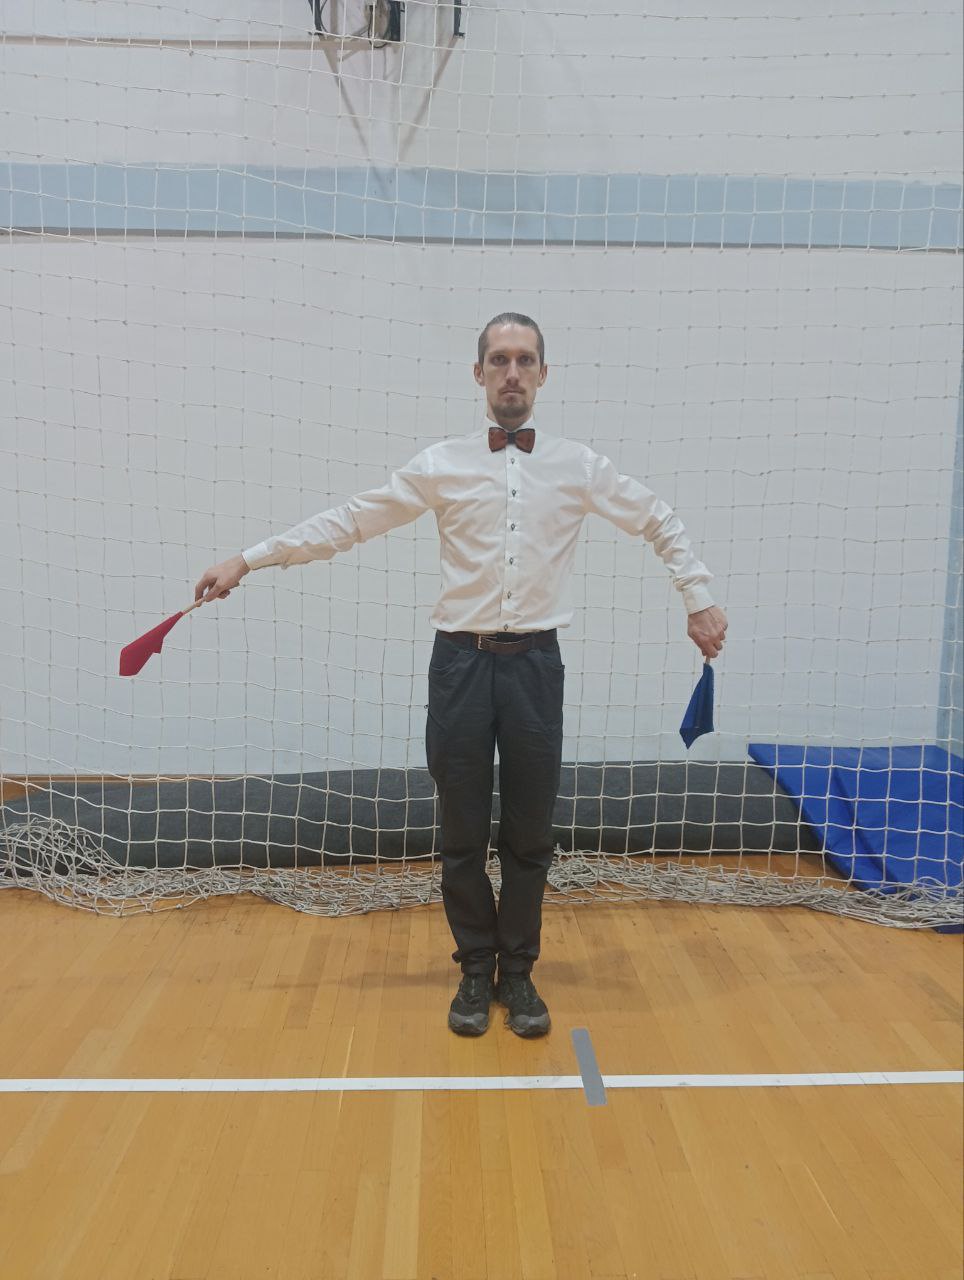
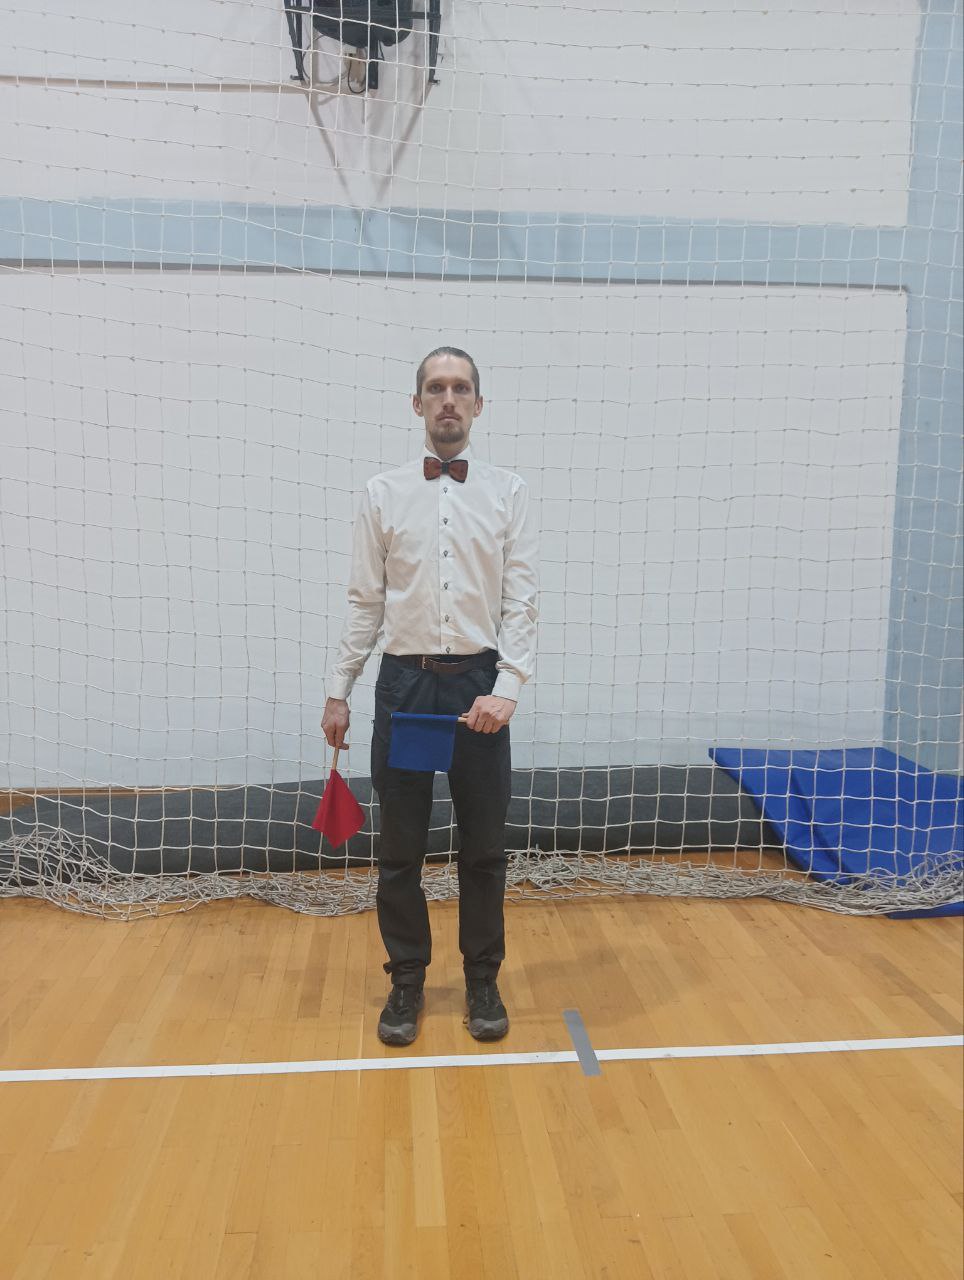
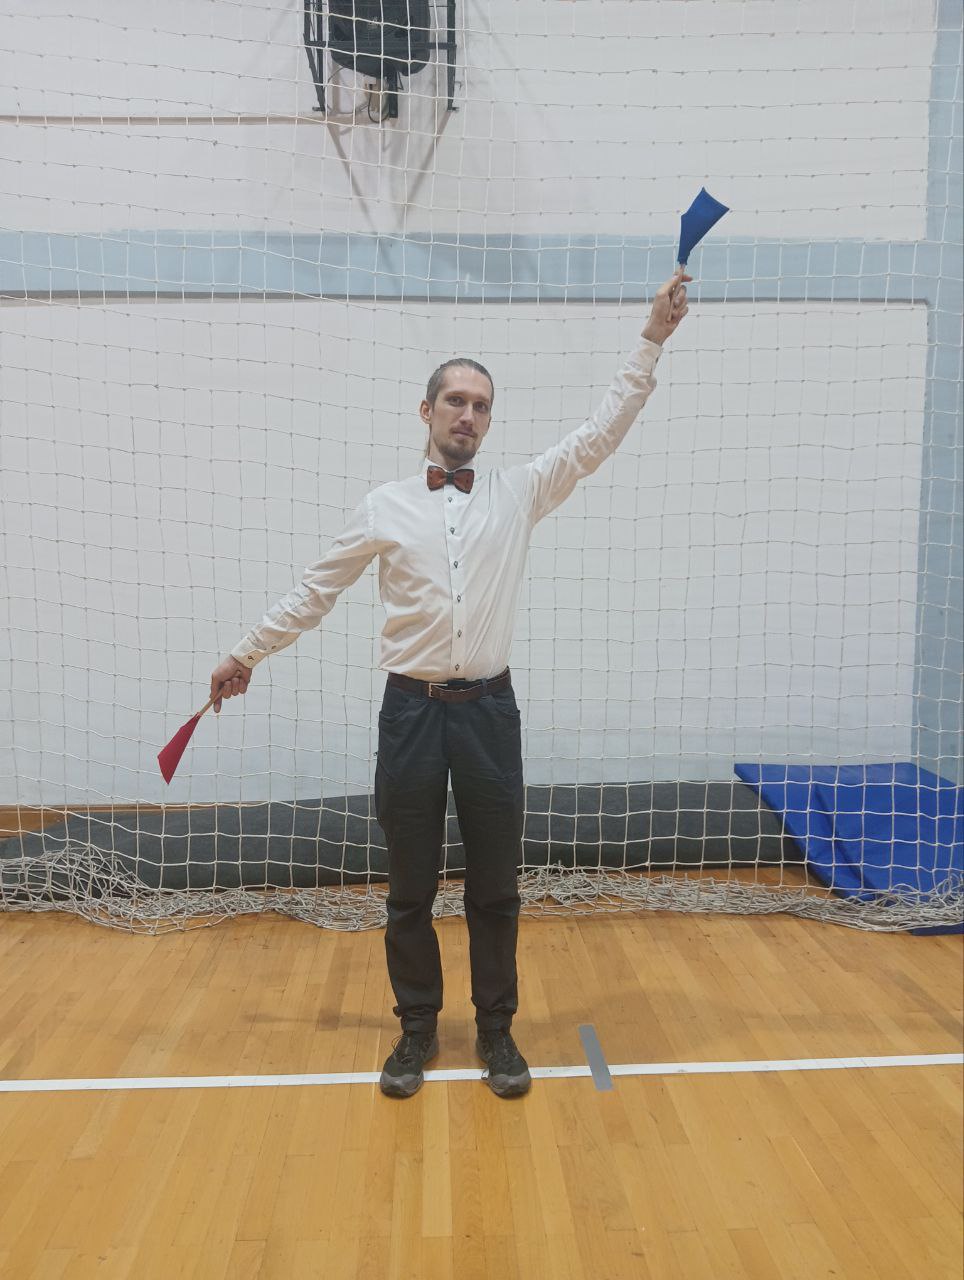
Initial position
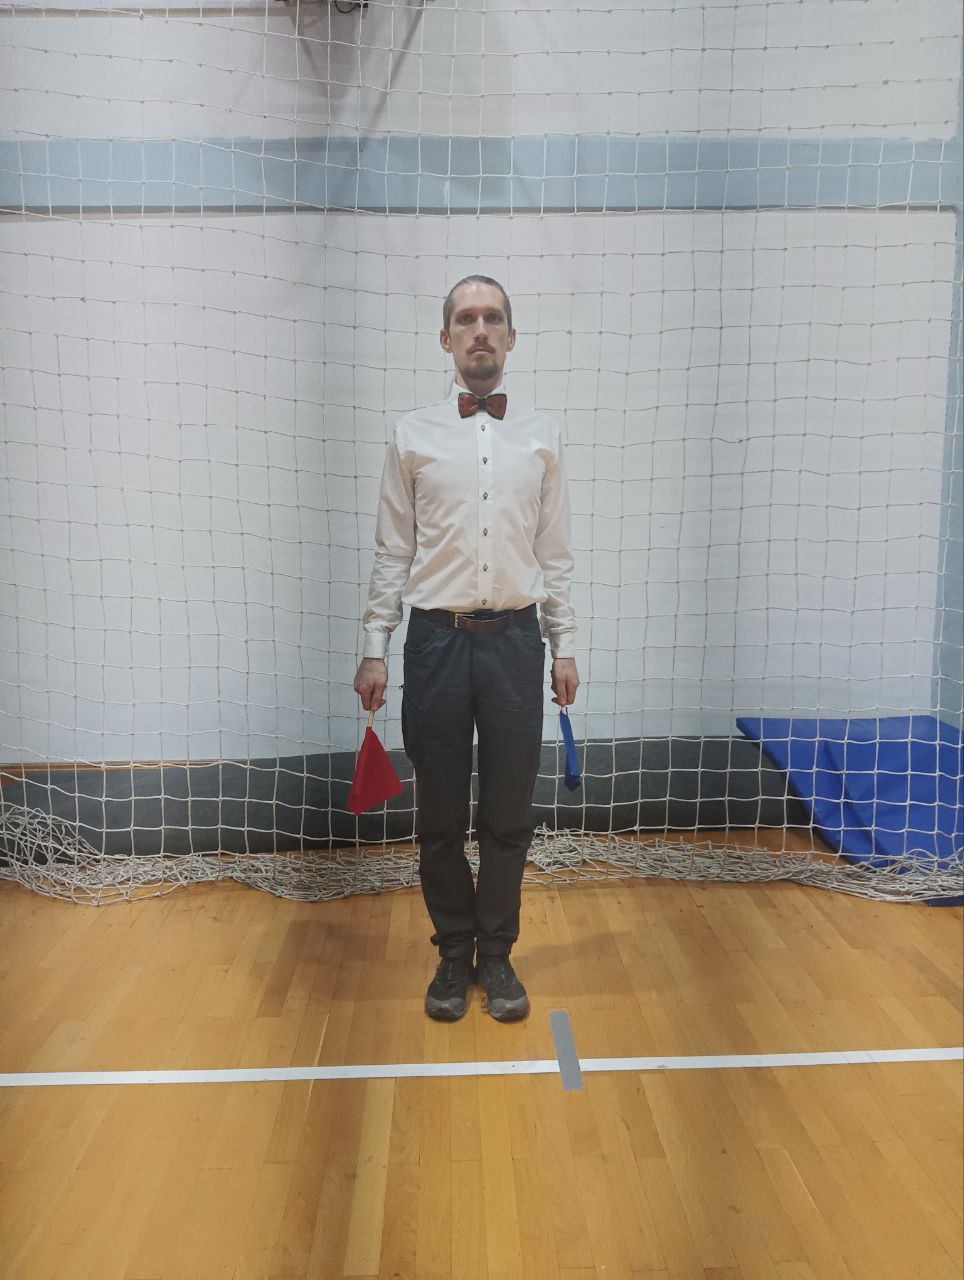
Flag color corresponds to the fighter from that side. The blue flag indicates the actions of the blue fencer, the red flag the actions of the red fencer. If the side judge remains in this position after “STOP”, it means there were no valid actions in the exchange.
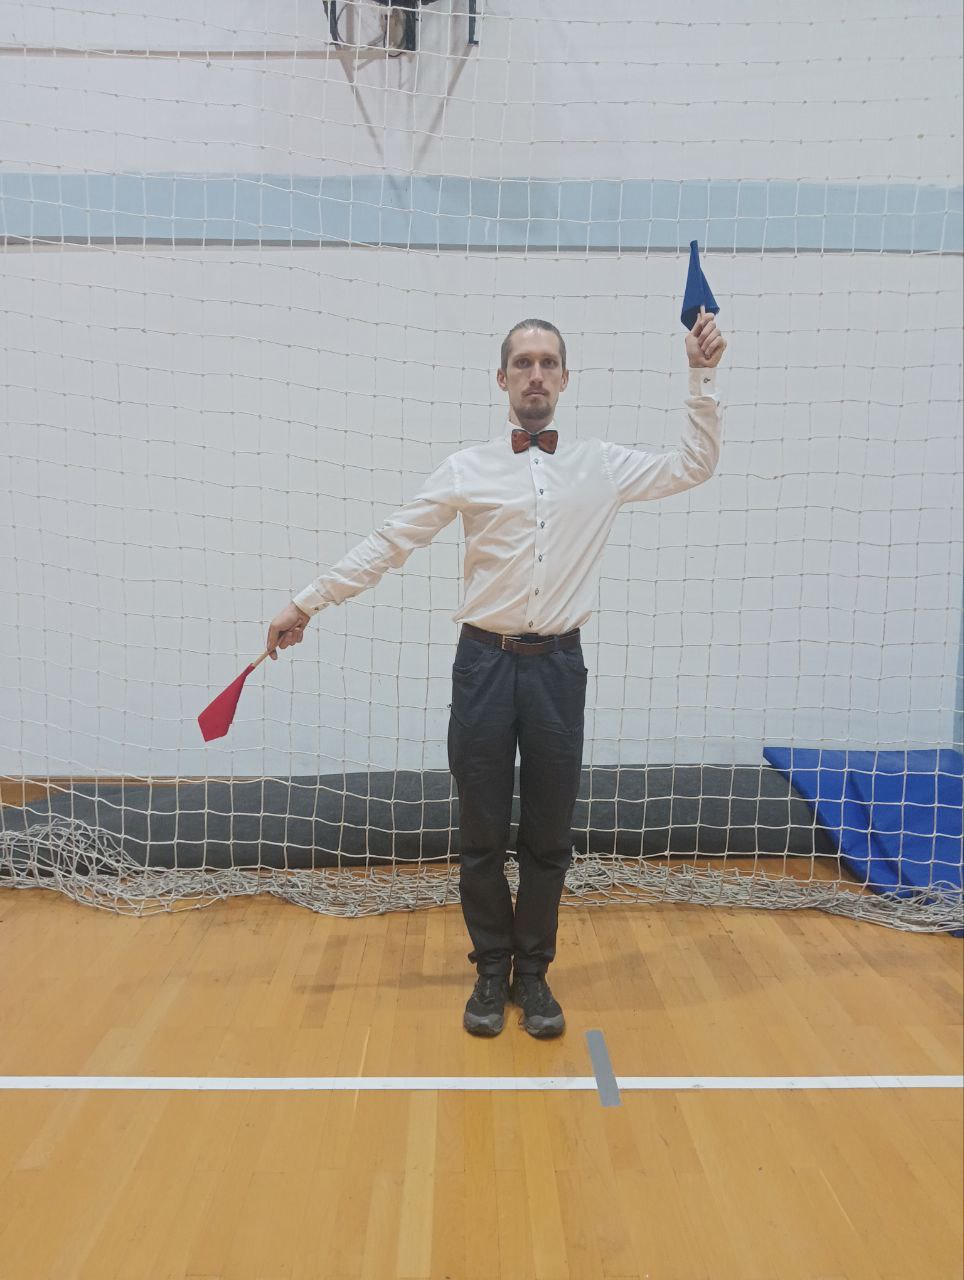
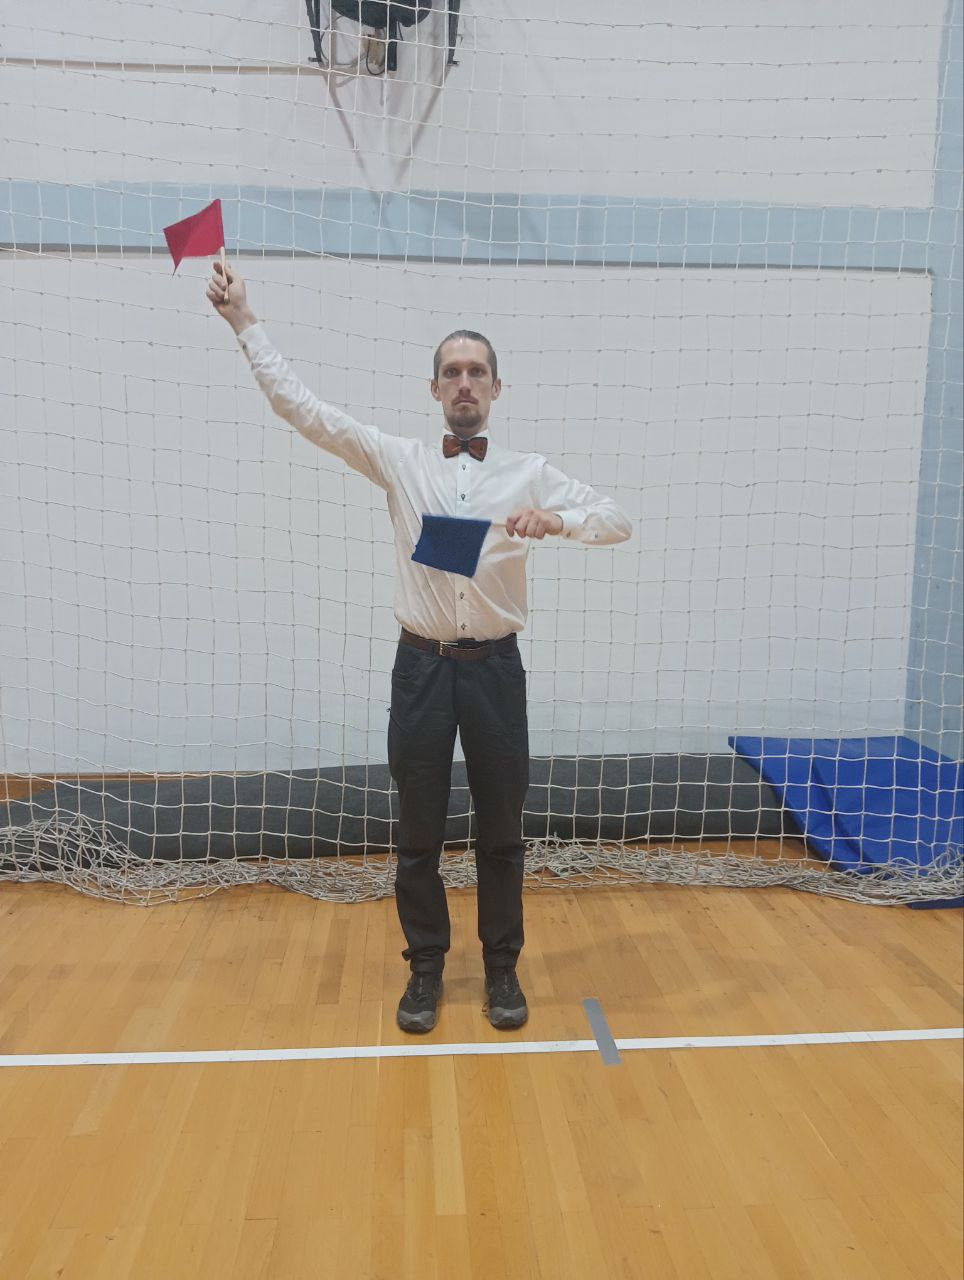
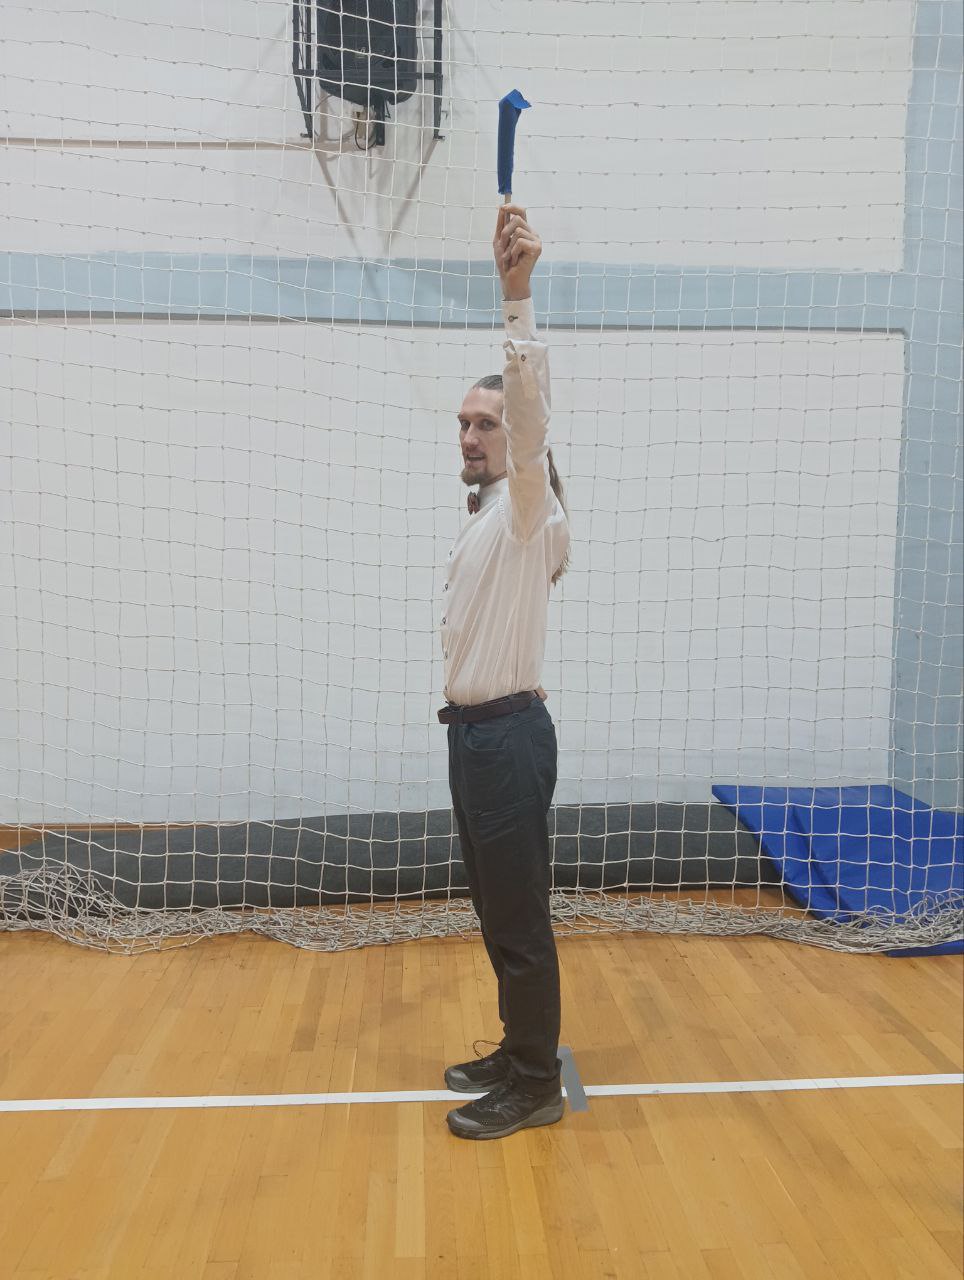
Valid action
Judge raises the flag for a valid action.
- Straight arm up = attack to the higher zone (2 points)
- Straight arm lower than shoulder = attack to the lower zone (1 point)
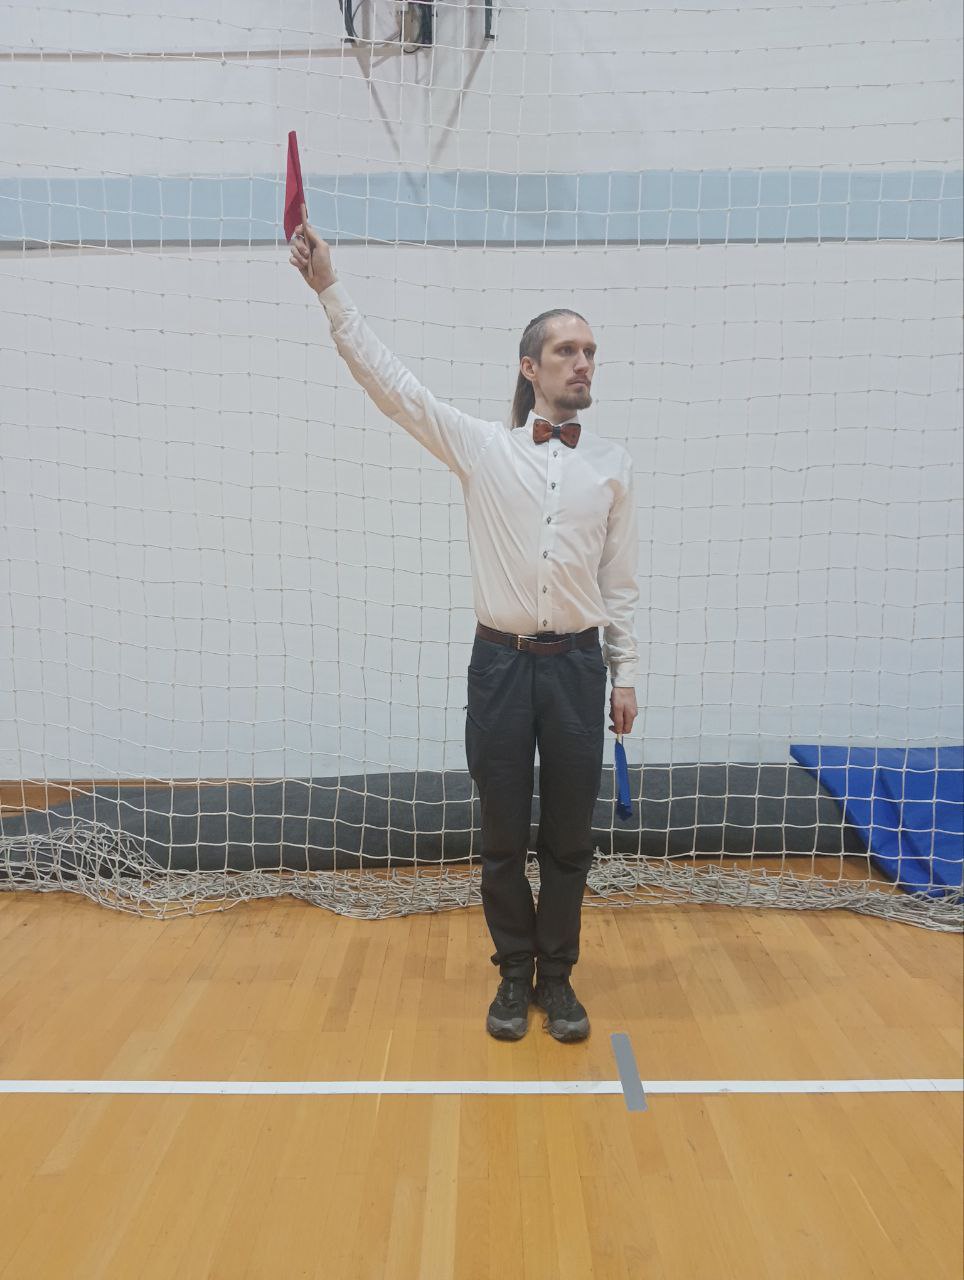
Example: Attack to the higher zone from red, no valid actions from blue; minus TWO points BLUE.
If the attack was too late (more than one tempo after the initial strike), show as no valid actions (flag down).
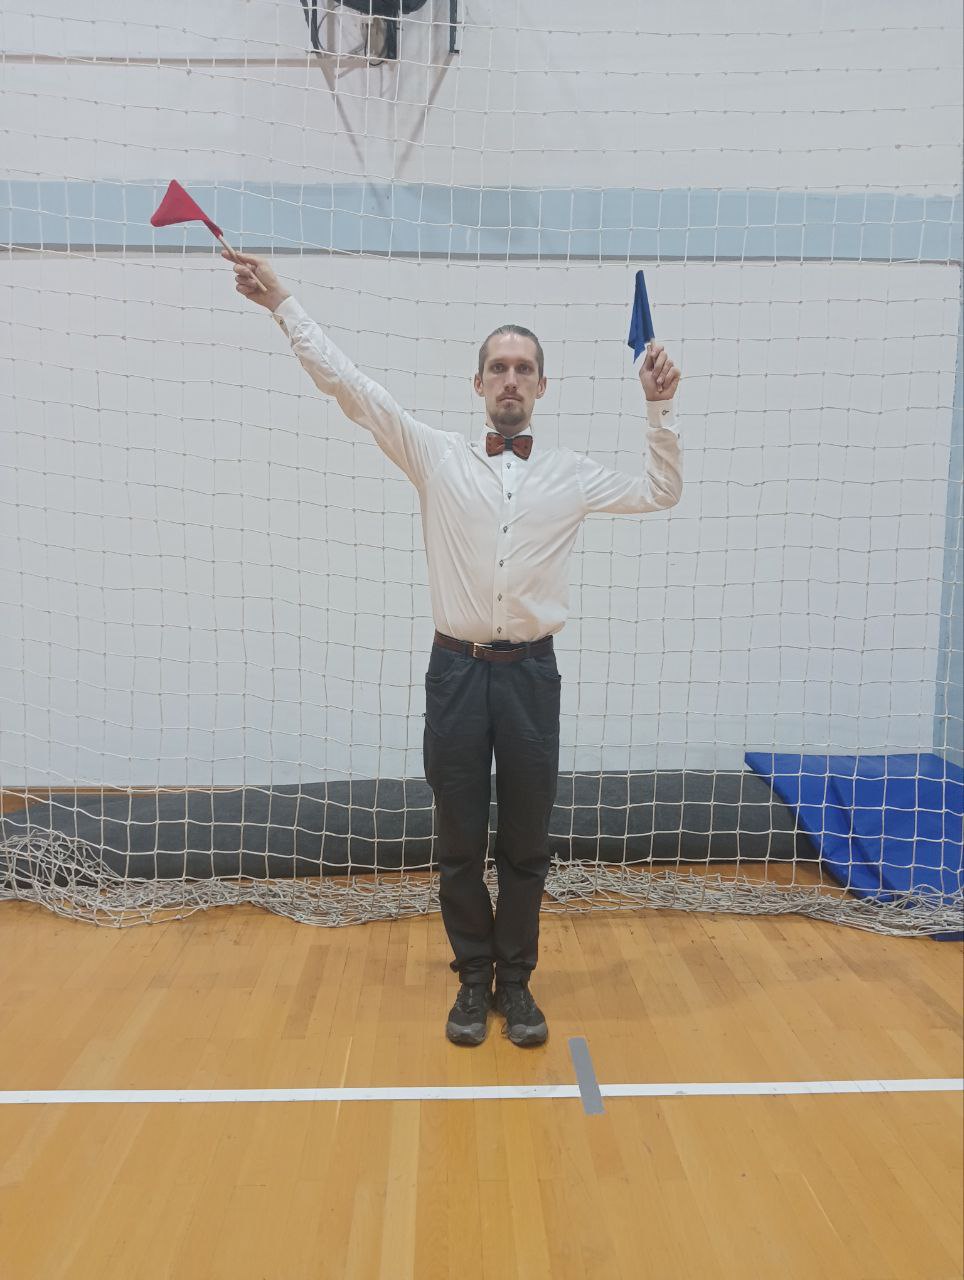
Double
Both flags are raised. Show the points for each strike, as they are scored independently.
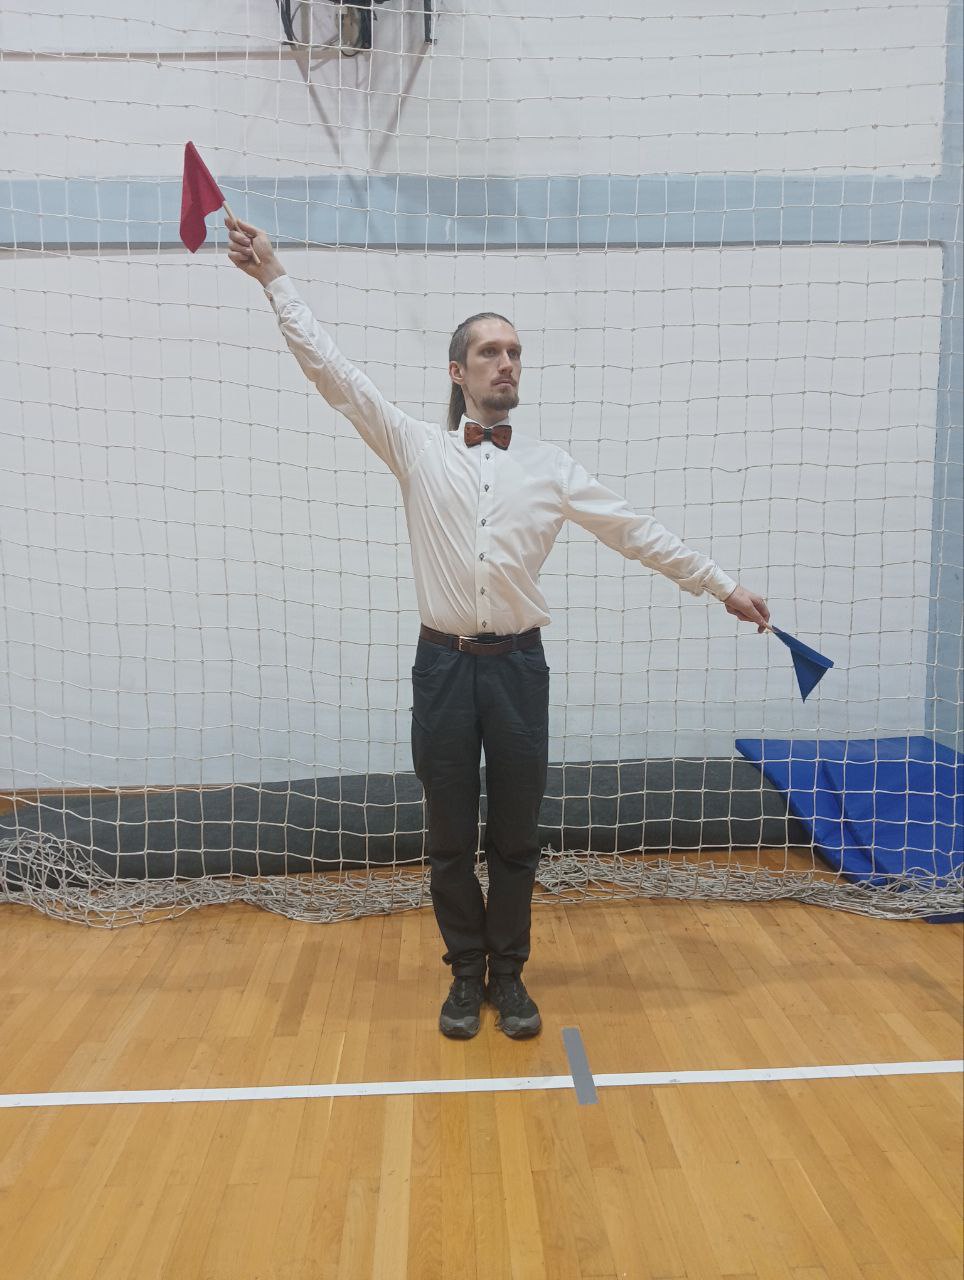
Example: Red attacked to higher zone, blue to lower zone. Minus ONE point RED, minus TWO points BLUE.
Example: Double to the higher zone, minus TWO points BOTH.
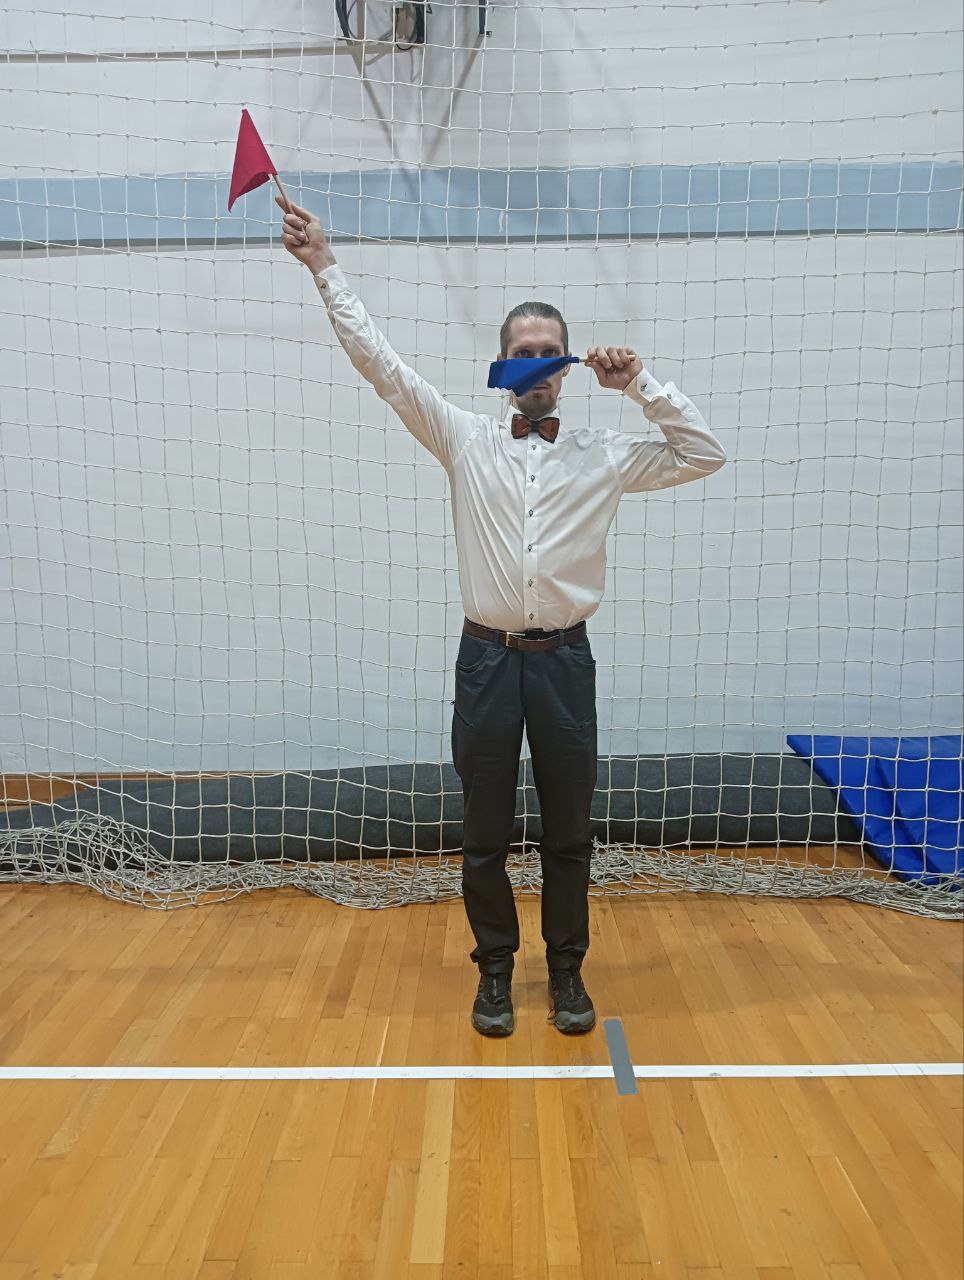
Afterblow
Shown with the bent arm:
- Down = afterblow to the lower zone
- Up = afterblow to the higher zone Zones are important.
Example: Red attacks to the lower zone, blue afterblow to the higher zone. Minus ONE point BLUE, minus TWO points RED.
Example: Red attacks to the higher zone (not stopping strike), blue afterblow to the higher zone. Minus TWO points BOTH.
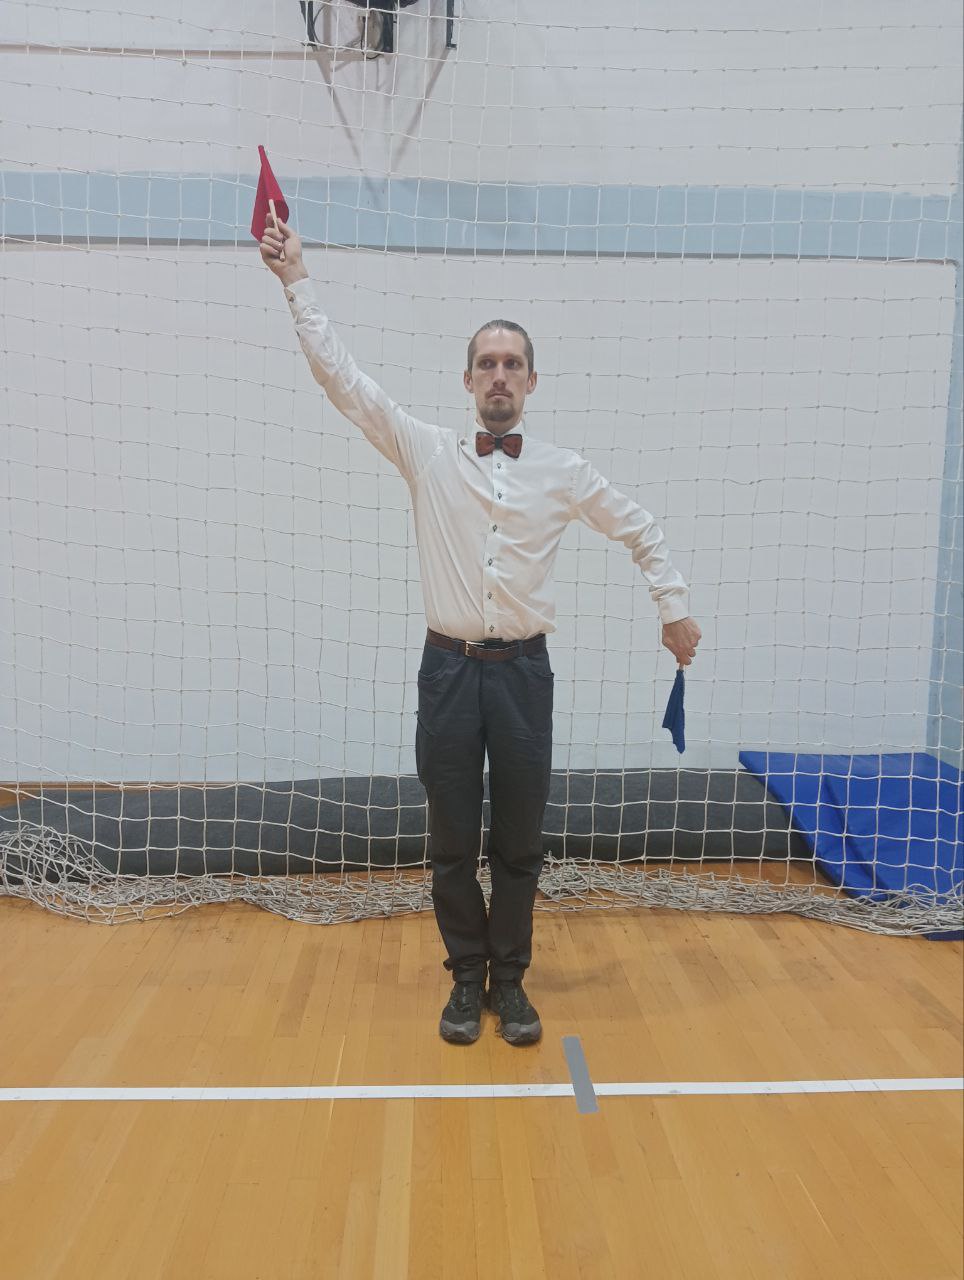
Example: Red attacks to the higher zone, blue afterblow to the lower zone. Minus TWO points BLUE, minus ONE point RED.
Example: Red attacks to the lower zone, blue afterblow to the lower zone. Minus ONE point BOTH.
Low quality action
If the judge has seen the attack and contact, but doesn’t qualify it (low travel distance, bad edge alignment, tip scratch, etc.), he puts the flag horizontally in front of his legs.
Example: Red: no action; Blue: low quality action.
Invalid afterblow
If the action was valid, but should not be counted because the first strike was a stop action, show the flag horizontally in front of the chest. This signal is important if the first action is discarded by the main judge.
Example: Red: attack to the head, stopping action; blue: invalid afterblow.
No opinion
If the judge wants to discard his opinion of an action, he places the flag in front of the face. This can happen if the point of contact was hidden or the judge was distracted. This is a message for the main judge: “I have no opinion.”
Example: Red: attack to the higher zone; Blue: no opinion.
Example: No clue at all about the exchange
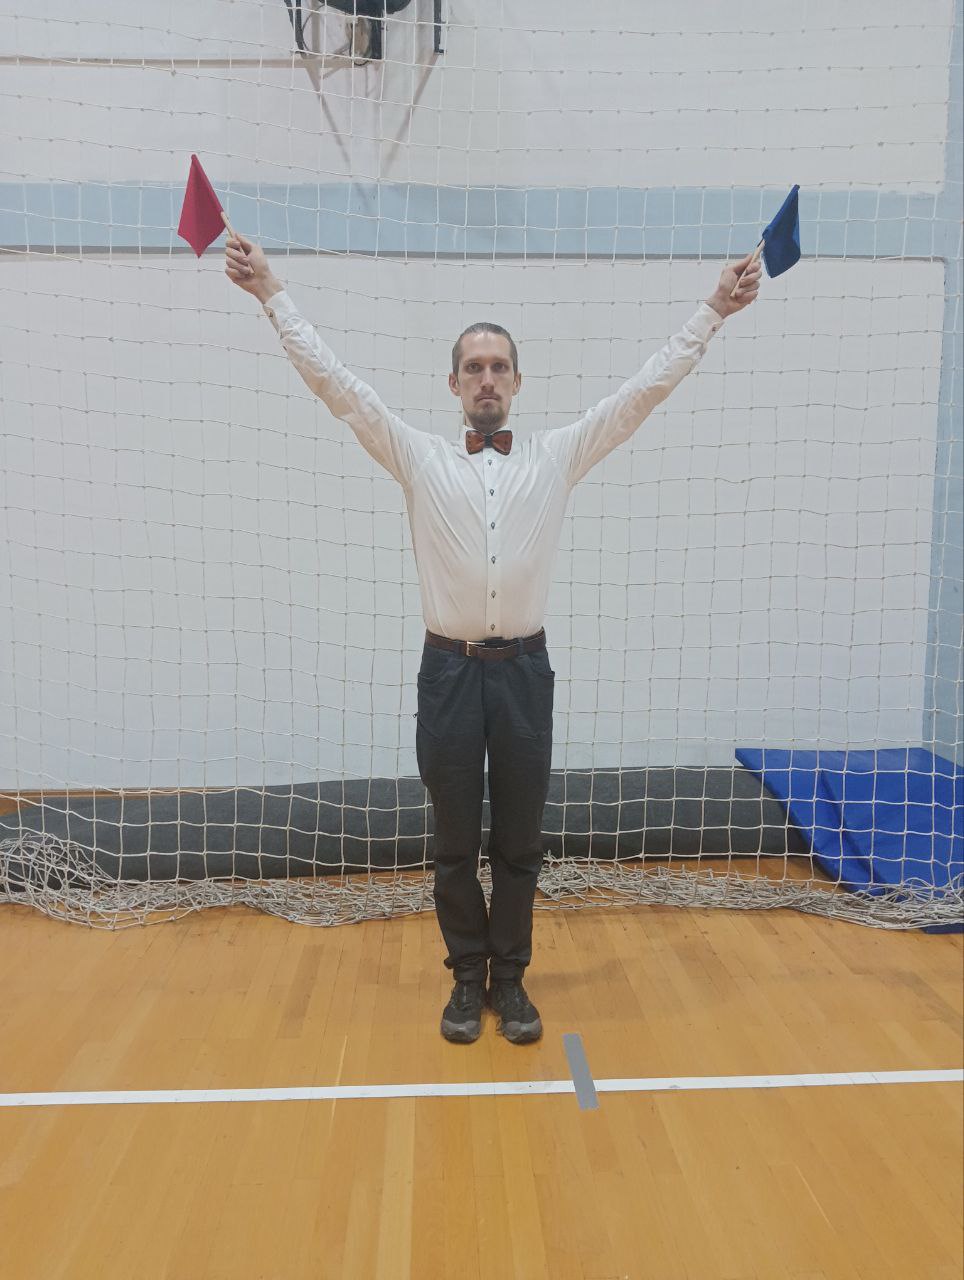
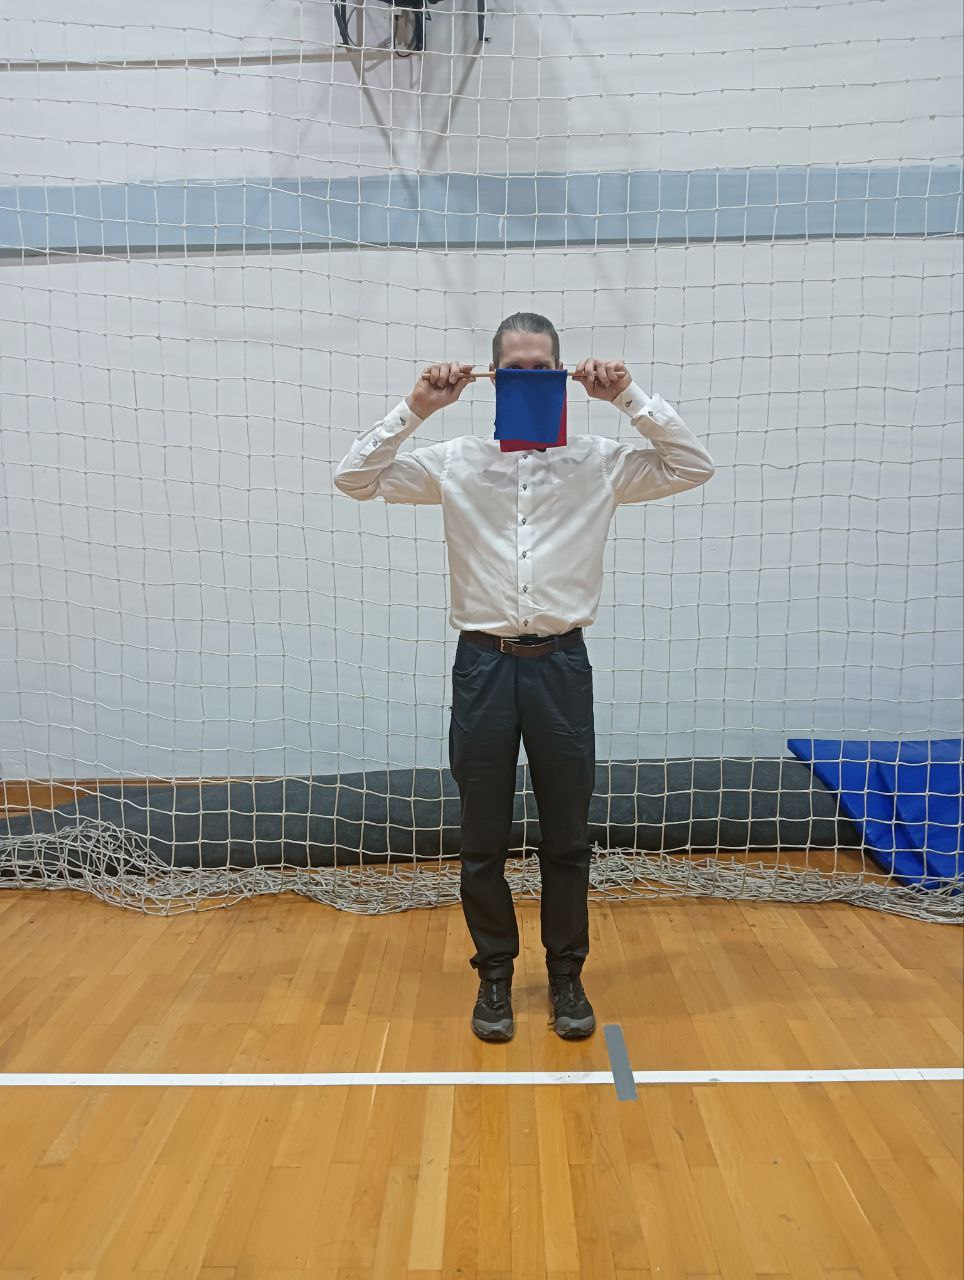
Rules violation
If you have seen a rules violation, show crossed flags up.
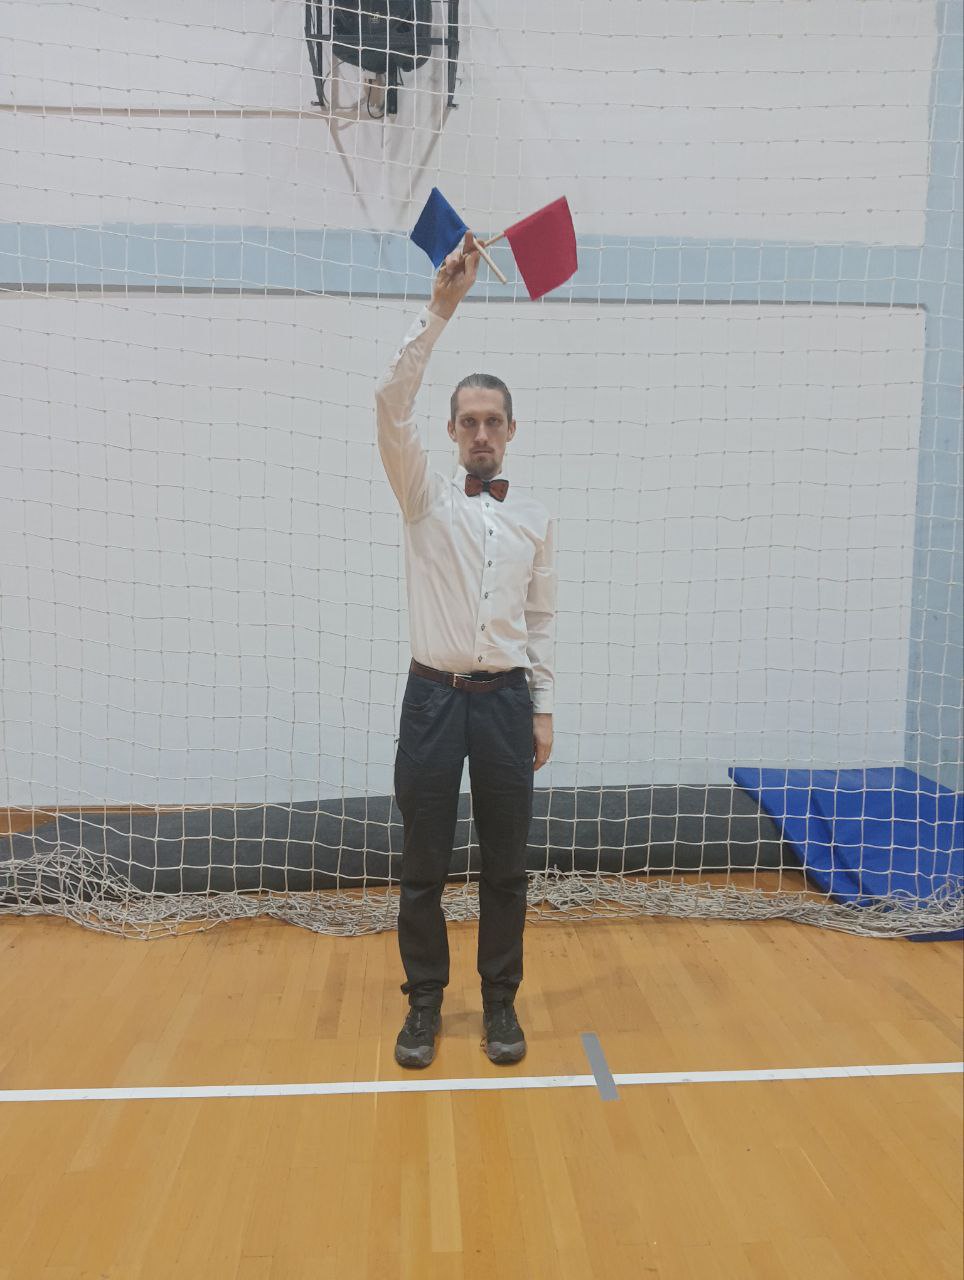
Show both flags to your main judge!
| YES | NO |
|---|---|
 |  |